


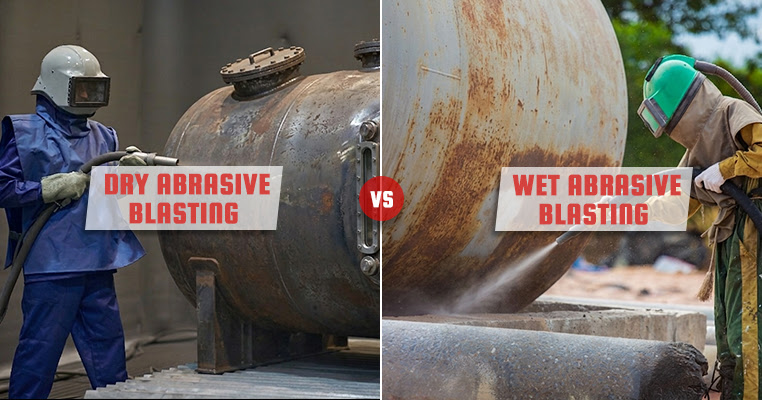
Wet and dry abrasive blasting can each work for you—or against you—if the wrong method is matched to your storage tank project. Blown schedules, regulatory violations and coating failures that cost far more than the original prep work are all very real possibilities when the strategy doesn’t fit the job. Most tank owners and project managers make this call under pressure, with a recoating deadline already closing in and a contractor ready to mobilize. What gets decided on day one does affect everything that comes after it.
The working differences between these two methods run deep. Spent media disposal requirements, silica exposure limits, flash rust timelines, anchor profile specs—these will change depending on which strategy you put to the steel. A fuel or chemical tank in a residential neighborhood will have a very different set of laws and restrictions than one sitting out in an open industrial yard. Location, local regulations, the condition of the surface and whatever coating system is going on afterward—that all plays into which strategy is actually the right call for a given project.
Neither strategy wins across the board. Wet blasting has an edge in dust-sensitive environments or anywhere near populated areas. That alone can make it the only viable option on some jobs. Dry blasting tends to move faster, gives crews tighter control over profile depth and cuts more aggressively through heavy corrosion. Either strategy will get you a compliant and coat-ready surface—you just need to match the right one to the job at hand.
Get those specifics locked in first, and the rest of the project gets a whole lot more manageable!
Let’s go through the two methods so you can choose the right one!
Why You Cannot Skip the Surface Prep
Poor surface prep is behind most of the coating failures on steel tanks. If the metal goes into service without being cleaned, the coating never bonds to the surface beneath it – and from there, it starts to blister, peel and break down well ahead of schedule. Your tank ends up out of service way too early.
The cost of a failed lining is real, and it grows fast. We’re talking about downtime, product loss and the labor it takes to strip everything back and start over. With fuel or chemical tanks, a lining failure can also contaminate whatever product you had stored inside – and at that point, what was already a bad situation gets quite a bit worse.
AMPP (formerly SSPC and NACE) created surface preparation standards for just this reason—contractors and owners need a shared language for details like cleanliness levels and surface profiles. Without one, everyone on a project ends up with a slightly different idea of what “acceptable” means—it’s where projects start to go wrong. A coating system is only as strong as the foundation that it sits on—and those benchmarks are what give everyone a real working definition of what “strong enough” actually looks like in the field.
A full tank inspection, an expensive cleanout and weeks of downtime during the exact season that you can’t afford to lose—none of that’s minor. For most tank owners, those are the situations that push the prep stage to the top of the priority list—not as an afterthought but as the foundation that the whole job is built on.
No matter which blasting strategy you go with, the goal is always the same—give the coating a clean and profiled surface to bond to, so it holds up for the full service life of the tank. Every other choice that you make along the way just comes back to that one goal.
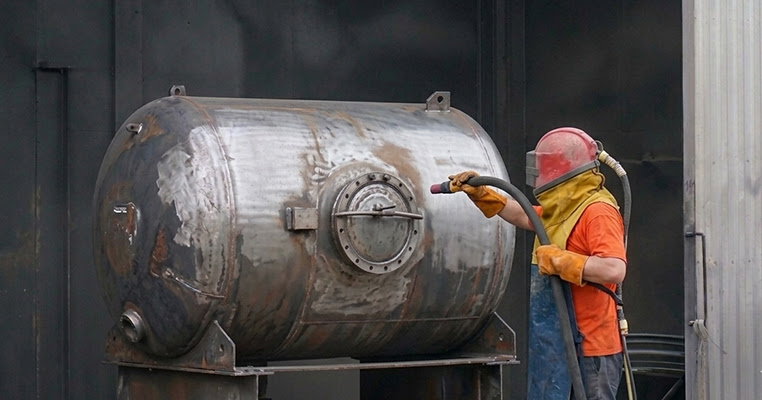
How the Dry Blasting Process Works
Epoxies and urethanes require specific texture (anchor profile) to bond correctly. Dry blasting delivers a highly uniform result across the whole tank surface. That level of uniformity from end to end is a big part of why crews usually reach for this on bigger projects.
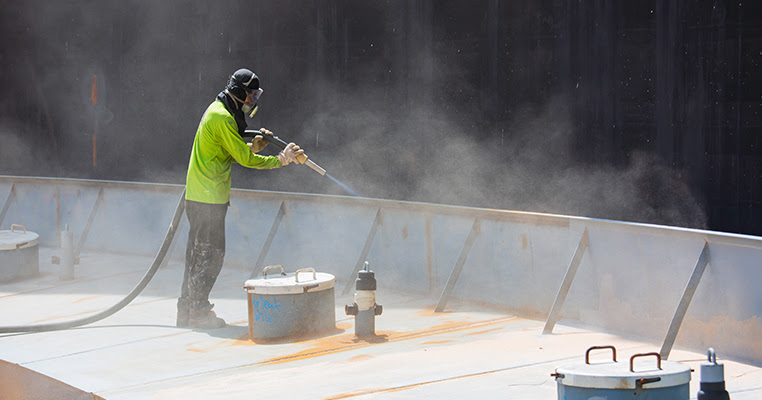
Dry blasting does take a bit more work on the setup side. The process generates a heavy dust cloud (it’s just part of how it works), so the work area needs full containment tarps around the tank and ventilation so all that airborne material doesn’t spread. It’s not a job where you can cut corners on the prep.
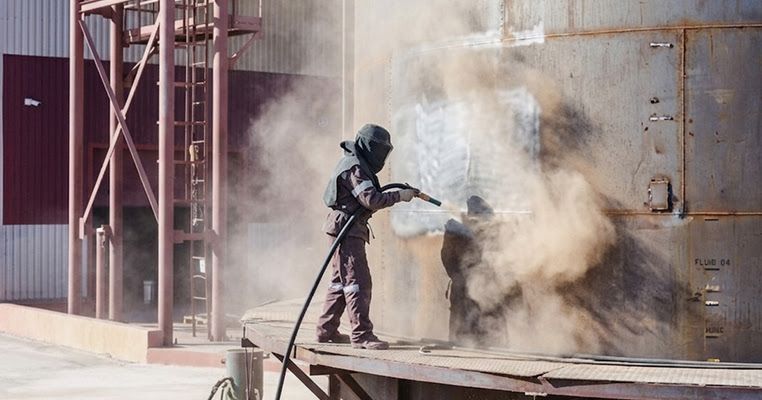
Containment is a legal necessity; abrasive media and paint debris are strictly regulated, and environmental fines for ‘dusting’ a neighborhood are substantial. In my experience, the crews that treat containment as an afterthought usually regret it.
When everything is done right, dry blasting leaves a clean surface that’s actually ready to coat. The setup is one of the more labor-intensive parts of the whole process, and it does take some patience to get it dialed in, but the end results are pretty hard to argue with.
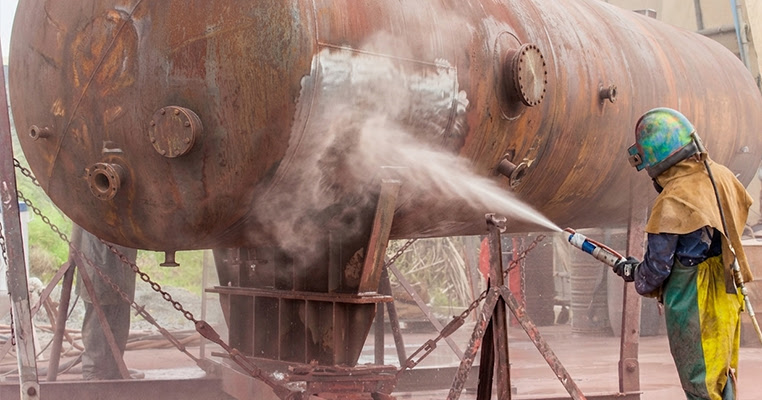
The Difference Between Wet and Slurry Blasting
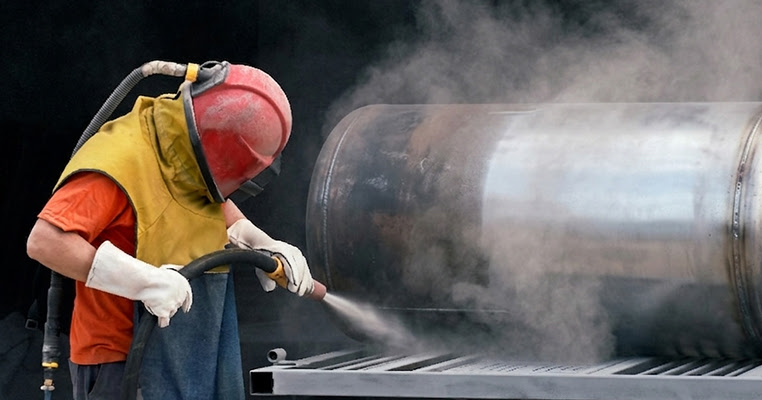
In wet blasting, dry abrasive is replaced by a pressurized combination of water and media. This significantly improves air quality and worker safety by suppressing dust. However, for tanks near residential areas or waterways, the management of wastewater is a critical distinction. Those dry particles that would have floated through the air now turn into a wet slurry that pools around the work area, creating unique containment and disposal challenges. This slurry often cannot be left to drain; it must be collected, tested, and disposed of according to local environmental laws.
Neither strategy has a built-in edge across the board—the right answer can depend on your site more than anything else. A tank out in an open field is a whole different job from one positioned next to a drainage channel or a row of houses. The location determines most of this, and in my experience, you want to have a sense of your surroundings before you settle on a blasting strategy. It also helps to think through the cleanup side of the job early (not after the work is already underway).
What OSHA and EPA Say About Dust
To choose the right blasting strategy, it pays to know the laws that you’re actually working with. OSHA: Strict limits exist for Permissible Exposure Limits (PEL) regarding crystalline silica dust. Dry blasting can exceed these limits quickly without high-end respiratory protection and ventilation.

The EPA can add another layer to this, and it gets much trickier when lead-based paint is involved. Any tank built before the 1980s is worth a closer look because many were coated with lead-based paints that were standard at the time. Dry blasting those old coatings without containment can put you on the wrong side of federal law before long.
As for coatings, what’s already on that tank is one of the first details worth figuring out before any work gets started because it can change a whole lot about how the job needs to be set up.
State and local air quality laws can also add a whole extra layer of complication to a project timeline. Plenty of regions have permits that take quite a bit of time to get approved, and it’s never wise to start work before those are in hand. Wet and slurry blasting methods are helpful at keeping airborne particles to a minimum, which goes a long way toward staying within those regional thresholds. Wet blasting is often favored by regulators in ‘non-attainment’ zones where air quality standards are particularly strict. This gives the method a distinct edge when you’re working in areas where air quality standards are more rigorous than the national average.
How to Deal With Flash Rust
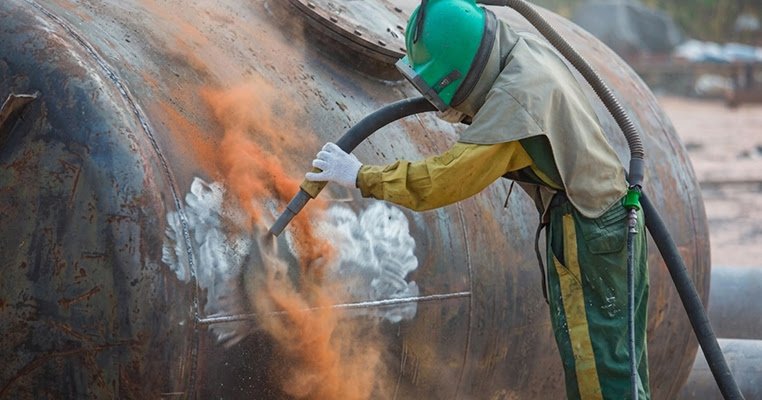
Wet blasting does a solid job of keeping dust levels down. On many job sites, that alone is reason enough to go with it. However, the trade-off is a challenge that many coating crews aren’t fully prepared for: flash rust. Bare steel can start to oxidize almost immediately after water contact, and the window between finishing the blast and applying the primer is incredibly tight.
Flash rusting is a critical concern for anyone choosing wet blasting to meet dust limits. Steel that has just been blasted clean is extremely reactive—even a thin layer of “rust bloom” can compromise the bond between the metal and your primer coat, defeating the whole purpose of the blast.
One of the more popular solutions is to add a rust inhibitor directly to the water during the blasting process. While effective, these are not permanent fixes; they merely “hold” the blast for a few hours or days, buying the crew enough time to work. Success requires precision and preparation. You need the right primer on hand, the right equipment staged, and a team that understands the timeline. Coating crews must be ready to prime almost immediately after the blasting finishes. Without this coordination, a crew could wind up re-blasting entire sections just to return to a clean surface, causing any time or cost savings from wet blasting to evaporate quickly.
Surface Prep Standards and the Anchor Profile
A coating on a storage tank is only as strong as the surface underneath it—and before anything goes on, that surface has to meet a minimum cleanliness standard. These benchmarks are defined by AMPP standards to ensure that the level of grit and purity matches the high stakes of the project. A coating system is only as strong as the foundation it sits on, and these standards provide the real-world definition of what ‘strong enough’ actually looks like in the field.
The coating manufacturer’s data sheet will specify exactly which AMPP prep level you need to hit. That designation deserves close attention. Fuel tanks and chemical storage tanks usually call for SP-10 or SP-5 because the stored contents are aggressive, and even a minor coating failure can escalate into a major structural or environmental problem very fast.
SP-10 is a near-white blast which removes almost all mill scale, rust and contaminants from the surface. SP-5 is a white metal blast (the highest level available), and it leaves the surface free of visible contamination. The extra prep time is well worth it for tanks that hold corrosive materials.
For the blast itself, a dry blast tends to give you a more uniform anchor profile across the full surface. That consistency matters quite a bit as the coating needs something to grab onto if it’s going to bond right. A wet blast can get you to the right profile as well. But it might need a little more follow-up measurement to make sure that the uniformity holds across the entire surface. In either case, a quick profile check with a replica tape or depth gauge confirms that you’re ready to move on.
Pull out your spec sheet before the job starts and double-check that your blast plan lines up with what the manufacturer actually calls for.
The Hidden Costs of Containment and Disposal
Wet blasting swaps airborne debris for wastewater, but that trade-off has its strings. All that water is now “contaminated” by whatever was on the tank—lead, chrome, or hydrocarbons. As it pulls these contaminants directly off the surface, the liquid becomes a regulated waste stream. Before any of it can be legally disposed of, it must all be contained, sent to a lab for testing, and handled under local environmental laws. None of that comes free.
Either strategy carries disposal costs tied to hazardous waste regulations, and those costs often land well outside what the original bid reflected. A contractor can quote a very competitive rate for the blast work itself, while the transport and disposal fees get quietly tucked into a separate line item—or sometimes left out of the bid altogether. This is often the most frustrating detail to discover when reviewing bids. Regardless of how it’s billed, the final invoice can look very different from the initial estimate.
The lab work alone can take a few days, and if the results flag additional contaminants, the disposal process gets more involved. Some facilities also have standards beyond what the state minimums call for. That can add another layer to what the contractor has to manage.
Before you sign off on anything, get a straight answer on who takes care of the spent media or the wastewater, how it gets tested and who is responsible for the bill. Ask those questions early—not after the work has already started. A low opening bid is a fine place to start a conversation. What it doesn’t tell you is what the full project actually costs by the time the tank is ready for the final coat.
Where The Pros Get Their Welding Rentals
Every storage tank project is a little different from the last, which is why no single blasting strategy will be right for every project. A tank’s location, its coating spec, local environmental laws and the budget can all pull the choice in very different directions, and sometimes all four variables are working against each other at the same time.
That’s what makes surface prep one of the harder parts of the job. The strategy that you choose will affect everything downstream—how long containment takes to set up, how tight the window is before flash rust sets in and what disposal will cost you. Those aren’t small details, especially on a bigger tank where the margins for error are a bit thinner.
The prep stage is the foundation for everything else in a coating job. Once you get into the specifics of what each strategy needs (the containment setup, flash rust windows and disposal costs), you’ve already avoided most of the problems that can derail tank coating projects before they’re done. The specifics covered here are just what separates a coating job that holds up for years from one that falls apart well ahead of schedule.

At Red-D-Arc, we make it easier to get what you need without having to buy everything outright. Whether it’s welders, positioners, protective gear or anything else that the job calls for, we have options to rent or buy—all designed around what you actually need in the field. Head to Red-D-Arc.com to check out our full catalog and find the right fit for your next project.


Leave a Reply